
Table of Contents
- Why Canvas Art Is Easier on Walls Than Framed Pictures
- Renter Friendly Wall Art Hanging: Options That Come Away Cleanly
- Best Tools for Hanging Pictures: What to Keep in Your Kit
- How to Hang Heavy Canvas Prints Safely
- Surface Preparation: Wall Texture, Paint Type and Humidity
- Removing Fixings and Adhesive Without Taking Paint With Them
- Planning a Gallery Wall That Works in a Rented Flat
- Frequently Asked Questions
Last Updated: September 10, 2026
Why Canvas Art Is Easier on Walls Than Framed Pictures
Canvas is lighter and more forgiving than glass-framed pictures, which makes it the smarter choice if you want to know how to hang canvas art without damaging walls. A stretched canvas weighs a fraction of a comparable framed print, so it needs less load-bearing hardware and puts less stress on plasterboard. This guide from Ben Ledi Print Media covers renter-friendly options, weight limits and safe removal, and every canvas we sell arrives with hooks fitted and ready to hang.
Damage rarely comes from the hook; it comes from the wall behind it. Get the surface, weight and removal method right, and the fixing becomes almost an afterthought.
Renter Friendly Wall Art Hanging: Options That Come Away Cleanly
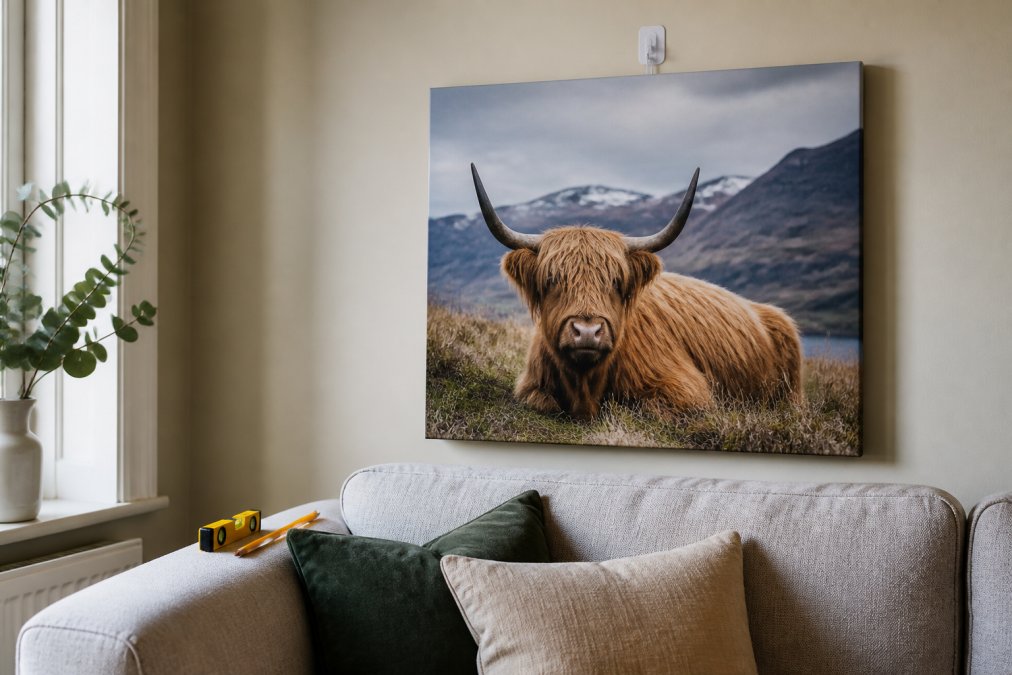
Renter friendly wall art hanging usually means choosing between adhesive strips, tension rods and picture ledges, and each suits a different wall. Adhesive strips suit light canvases on smooth, sealed paint, tension rods need no fixings but only work between two opposing surfaces, and picture ledges rest on a bracket or sit freestanding so the artwork never touches the wall.
Adhesive Strips and Hooks: What They Hold and Where They Fail
Adhesive strips hold best on smooth, painted plasterboard and fail fastest on textured or freshly painted walls. Manufacturers print a weight capacity on the packet, and the honest rule is to halve it. Failure almost always traces back to dust, damp or a surface that never cured.
- Clean the wall with isopropyl alcohol and let it dry fully
- Press the strip firmly for the full recommended time
- Wait before hanging, then add the canvas
- Avoid above radiators, kettles or steamy bathrooms
Tension Rods and Picture Ledges for No-Hole Display
Tension rods and picture ledges give you temporary decor with no wall penetration at all. A tension rod wedged between two walls or inside a window recess can carry a lightweight canvas by clip or loop, while a picture ledge lets you swap art without touching the wall. Both suit renters who move often.
Best Tools for Hanging Pictures: What to Keep in Your Kit
The best tools for hanging pictures are a spirit level, a soft pencil, a tape measure, a small hammer and the correct fixings for your wall type. Skipping the level is the most common mistake: a canvas a few millimetres off true is noticeable the moment anyone walks past it.
A basic kit covers almost every job:
- Spirit level, ideally 60cm or longer
- Soft pencil and low-tack masking tape
- Tape measure and a small screwdriver
- Assorted hooks: sawtooth hanger, picture wire, flush mount
- Wall plugs and screws matched to your substrate
Levelling, Marking and Vertical Alignment
Mark your fixing point with a pencil dot, then check it with the level before you commit. For a single canvas, centre it at eye level, roughly 145cm to 150cm from the floor. For a pair, mark both centres and run the level across them so the tops align.
How to Hang Heavy Canvas Prints Safely
Hanging a heavy canvas safely means matching the fixing to the frame weight, not guessing. Canvases over roughly 60cm wide need proper mounting hardware rather than adhesive alone. If the canvas has a fitted sawtooth hanger, use it, but back it up with a wall fixing rated above the frame weight.
Working Out the Weight-to-Fixing Ratio
Use a simple rule: the fixing should carry at least twice the weight of the canvas. Weigh the piece on kitchen scales if you are unsure. A 2kg canvas wants a fixing rated to 4kg or more. For anything heavier, drive into a wall stud or use a plasterboard plug designed for load-bearing.
| Canvas Weight | Adhesive Strip | Single Hook | Wall Plug and Screw |
|---|---|---|---|
| Under 1kg | Suitable | Suitable | Suitable |
| 1kg to 3kg | Borderline | Suitable | Suitable |
| 3kg to 6kg | Not advised | Check rating | Recommended |
| Over 6kg | No | No | Required |
Surface Preparation: Wall Texture, Paint Type and Humidity
Wall texture, paint type and humidity decide whether any fixing holds. Adhesives need a smooth, sealed, dust-free substrate, and the surface you actually have matters more than the strip you buy. Treat this as the diagnostic step before committing to any method.
Matching the Method to Your Wall Texture
Run a fingertip across the wall before you buy anything. The finish tells you what will hold.
- Smooth, sealed paint (flat or low-sheen plasterboard): the ideal surface for adhesive strips and hooks. Wipe with isopropyl alcohol, let it dry, and press firmly.
- Orange-peel or light roller stipple: common on modern plasterboard. The peaks and valleys reduce the contact area of a strip, so halve the stated weight capacity and prefer a hook over a strip for anything above a small canvas.
- Knockdown or heavy textured plaster: adhesive strips rarely hold for long because the strip bridges the texture rather than bonding to it. Use a mechanical fixing into a stud or a plasterboard plug, or rest the canvas on a picture ledge.
- Textured wallpaper and bare plasterboard: both shed fibres that weaken the bond. Seal bare plasterboard with a mist coat first, or avoid adhesive altogether.
- Masonry, brick and stone: adhesive is unreliable on porous or dusty surfaces. A wall plug and screw is the safer route, and a canvas with hooks fitted is straightforward to hang this way.
If you are unsure what is behind the paint, tap the wall. A hollow sound usually means plasterboard; a solid thud usually means masonry. That single test narrows your options quickly.
Paint Type Changes How You Remove, Not Just How You Hang
Paint finish affects grip and, more importantly, how the surface behaves when you take the fixing down.
- Matt emulsion: grips adhesive well but marks and lifts easily. Work slowly on removal and expect to touch up small patches.
- Eggshell: a middle ground. Adhesive holds reasonably, and removal is more forgiving than matt.
- Silk and washable finishes: slick, so adhesive grips less well, but the cured film resists lifting better when you stretch a strip off.
- Gloss: the slickest of the common finishes. Adhesive is a poor choice here; lean on mechanical fixings or a ledge.
Freshly painted walls cause the most trouble: emulsion keeps releasing solvent for days after it looks dry, and a strip applied too soon can slide. Wait at least a week, longer in cool or damp conditions.
Humidity and Climate: Where Adhesives Quietly Fail
Humidity is the quiet killer. Kitchens, bathrooms and any room that swings in moisture soften adhesive as it cycles between damp and dry, so a strip may hold for weeks then release without warning, taking paint with it.
- Bathrooms and shower rooms: use mechanical fixings or a freestanding ledge rather than adhesive. Steam is relentless.
- Kitchens: avoid hanging directly above a kettle, hob or dishwasher, where steam and heat concentrate.
- Above radiators and in conservatories: heat and temperature swings weaken adhesive over time.
- Cold external walls: condensation can form behind a canvas and undermine the bond. A small air gap from a ledge or a mechanical fixing avoids the problem.
If you rent and cannot drill, a picture ledge or tension rod in a dry room is the more reliable choice. For homeowners, a plasterboard plug or a fixing into a stud removes the humidity question entirely. Every Ben Ledi Print Media canvas arrives with hooks fitted and ready to hang, so once you have chosen the right fixing, the canvas itself is the easy part. Browse our Scottish canvas prints to find a piece worth planning around.

Removing Fixings and Adhesive Without Taking Paint With Them
Removal is where most paint damage happens, so slow down. The technique that works on one finish can lift the topcoat on another, so match your method to the surface.
The Universal Rule: Stretch, Do Not Pull
Never pull a strip straight off the wall. Stretch it downwards, parallel to the surface, in a long slow motion as the manufacturer instructs, supporting the wall with your free hand. Pulling outwards is what tears paint.
For residue-free removal:
- Warm the strip gently with a hairdryer on low, holding it a hand's width away
- Hold the tab and stretch straight down, not out
- Keep the stretch slow and steady; rushing is what causes lifts
- Wipe any residue with warm soapy water, not solvent
Removal Protocols by Paint Finish
Different finishes behave differently under the same technique. Adjust accordingly.
- Matt emulsion: the most fragile. Warm the strip first, stretch very slowly, and accept that a small touch-up may be needed. Keep a sample pot of matching emulsion to hand.
- Eggshell: more forgiving. The same slow stretch usually releases cleanly, and residue wipes away with warm water.
- Silk and washable finishes: the cured film resists lifting well. You can stretch a little more firmly, but still avoid pulling outwards.
- Gloss: slick and hard-wearing, but adhesive tends to leave residue. Warm the strip, stretch slowly, then wipe with warm soapy water rather than an abrasive pad.
- Textured or wallpapered walls: avoid adhesive in the first place where you can. If you must remove a strip, go extremely slowly and expect some surface disturbance.
Removing Mechanical Fixings Cleanly
Hooks, screws and wall plugs leave holes, and the goal is to keep them small and tidy.
- Unscrew the hook or fixing slowly, supporting the wall around it
- If a plug is stuck, score gently around the edge with a craft knife before easing it out
- Fill small holes with a lightweight filler, let it cure, then sand flush
- Touch up with matching emulsion once the filler is dry
On plasterboard, avoid over-tightening on removal, as the paper face can tear. On masonry, a slow twist beats a sharp tug.
When Something Does Go Wrong
If a small patch of paint lifts, let it dry, sand the edge lightly with fine paper and touch up with matching emulsion, feathering the edges so the repair blends. For larger lifts, a thin skim of filler and a repaint usually hides the damage. That is why testing an inconspicuous area first pays off, and why mechanical fixings into a stud or plug remain safer for heavier pieces.
Ben Ledi Print Media canvases arrive with hooks fitted and ready to hang, so the fixing is the only variable you need to manage. Choose the method that suits your wall and paint, and removal becomes a calm five-minute job rather than a repair project. Browse our Scottish canvas prints when you are ready to plan your next wall.
Planning a Gallery Wall That Works in a Rented Flat
A gallery wall in a rented flat works best when you plan the layout on the floor first and keep fixings to a minimum. Lay the canvases out, shuffle until the spacing feels right, then photograph the arrangement before anything goes on the wall. Keep gaps consistent, usually 5cm to 8cm, and align tops or centres rather than mixing both.
For renters, lean on lightweight canvases and adhesive where the wall allows, and cluster heavier pieces over a ledge or freestanding shelf. Mixing sizes looks intentional; matching every frame looks flat. Our Scottish landscape and Highland cow canvases sit happily alongside abstract prints, and because each arrives ready to hang with hooks fitted, you can rearrange the wall whenever the mood takes you.
Frequently Asked Questions
What is the easiest way to hang canvas art on the wall?
Canvas is lighter and more forgiving than glass-framed pictures, so the simplest route is a single hook or adhesive strip rated above the weight of the piece. Ben Ledi Print Media canvases arrive with hooks already fitted, so you only need one fixing point and a spirit level. Mark the spot with a pencil, check it sits at eye level, then hang and adjust. One hook, one mark, one canvas, done in minutes.
Can I hang canvas prints without using nails?
Yes. Adhesive strips and hooks, tension rods and picture ledges all hold canvas without nails. The catch is weight: most adhesive products are rated for lighter loads, so check the pack figure against your canvas and add a margin. Textured or freshly painted walls reduce grip, and warm rooms soften the adhesive over time. For anything heavier, a single small nail or screw into a stud is often the safer choice.
How do I make sure my canvas print hangs level?
Fit the hook, then hold a spirit level against the top edge of the canvas and adjust until the bubble sits centred. Mark the hook position with a pencil before you commit, and use a light pencil line you can rub out later. On a gallery wall, measure the spacing between frames rather than eyeballing it, and keep the gaps consistent. A laser level speeds this up if you already own one.
What should I consider before hanging art in a rented property?
Check your tenancy agreement first, since some landlords restrict fixings altogether. Keep holes small and few, favour adhesive hooks or ledges where weight allows, and photograph the wall before and after so you can show it was left in good order. Avoid hanging anything heavy on plasterboard without a stud or proper wall plug. On move-out day, remove fixings slowly and fill any pinholes with a little filler.
Hanging art well comes down to respecting the wall, not just the picture. Ben Ledi Print Media crafts handcrafted canvas prints with hooks fitted and ready to hang, so you spend your time choosing the piece rather than wrestling with hardware. Browse our Scottish canvas prints and Highland cow artwork to find something that suits your space, whether you own it or rent it. Get started with Ben Ledi Print Media and transform your walls into a work of art.